Without realizing it, I made 3 dresses featuring blue roses last summer. The first was another of Gertie’s patterns from her book. The pattern needs a little tweaking to suit my shape but I’m pretty happy with the results.
The Sweetheart Sundress from Gertie’s New Book for Better Sewing
Made from a vintage bed sheet (with fab border print), I followed the pattern with a few modifications. The version pictured in the book didn’t look like it would be too flattering on short waisted me, so I added fullness to the skirt which helped give the dress a better shape. I ended up using the full width of the sheet (78″). It’s also a bit longer (24″) so it covers my knees and hopefully doesn’t cut my legs off in an odd way.
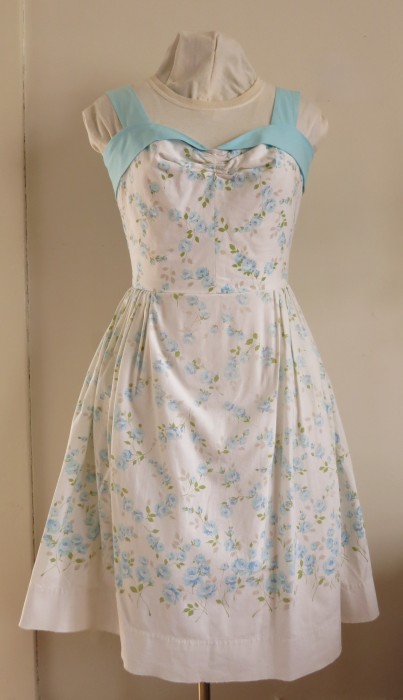
Gertie’s Sweetheart Sundress by Heather Lee Bea 2013. Cotton Sheeting.
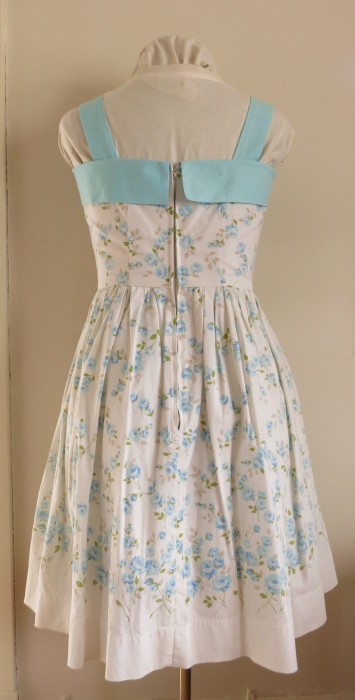
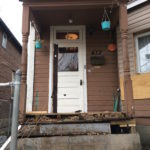
Gertie’s Sweetheart Sundress by Heather Lee Bea 2013. Back view.
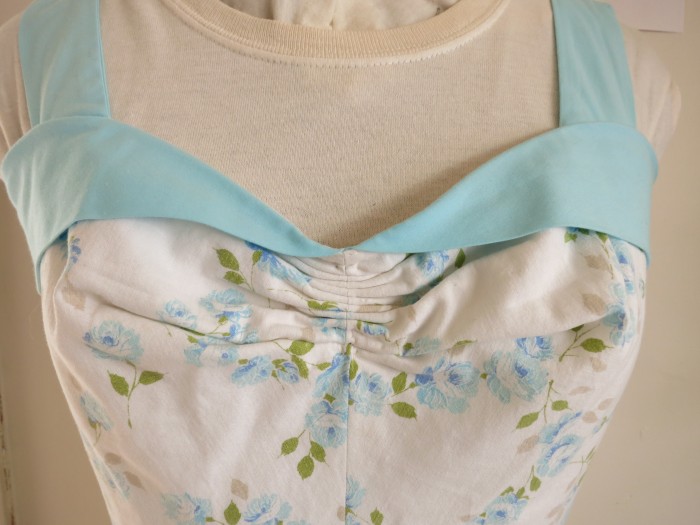
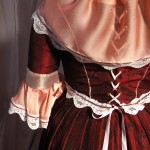
Gertie’s Sweetheart Sundress by Heather Lee Bea 2013. Neckline detail.
As part of my ongoing sewing goals, I inserted side pockets about 2″ below the waist seam cut from some left over white cotton.
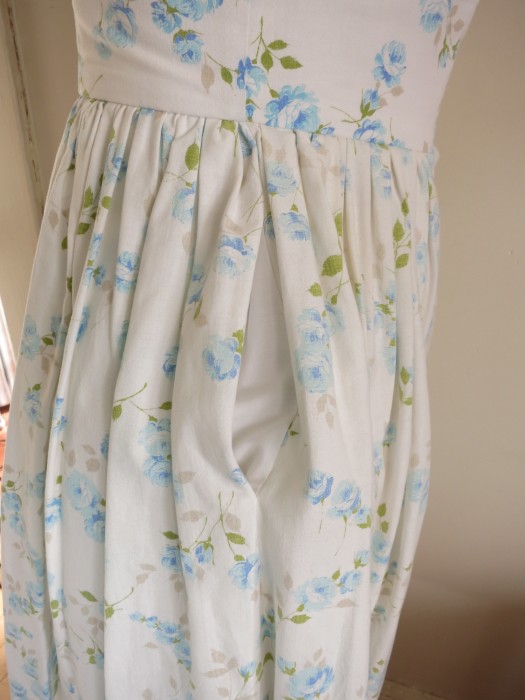
Gertie’s Sweetheart Sundress by Heather Lee Bea 2013. Pockets!
The pocket fabric was used as a lining, but was not gathered as it was actually part of the ‘donut’ shape removed from the Wedding Quilt. A semi circle is enough to allow movement without adding too much extra bulk at the waist. Both skirt and lining are one continuous piece, and so were split at the sides about 10″ down to allow for the pockets. The gathers in the skirt hide the pocket openings really well!
Future pattern mods:
1. The centre front curve needs to be trimmed down and slashed to make it less bulky. The gathers in the front do not reduce the excess fabric enough for my bust. I suspect it would work fine for someone with a larger set. To fix the issue on this dress, I took it in about 1″ (horizontally) in the centre front where the gathers are.
2. I cut out the smaller size of those of which I was in between which resulted in a good fitting waist but there is still a little room at the top of the bodice. Unfortunately this is one of those patterns that needs to be nearly completed in order to fit properly so a little hard to tell when you can still fix it properly. I suspect the bodice also sits a little lower on me than intended but I like the placement. I also used a 1/2″ seam allowance instead of the 5/8″.
3. I might consider leaving the straps off completely until the end, as inserting them on the front during bodice construction does not allow for adjustments later. I feel I could get a better strap angle/fit if I could move both ends, then they can be machine stitched to the top edge under the bias band, and hand tacked to the lining.
Stay tuned for Parts 2 and 3!
~ Heather