
In my attempt to keep up with recent goals of making things for myself and also using my vintage pattern stash, I chose this 1965 blouse pattern:
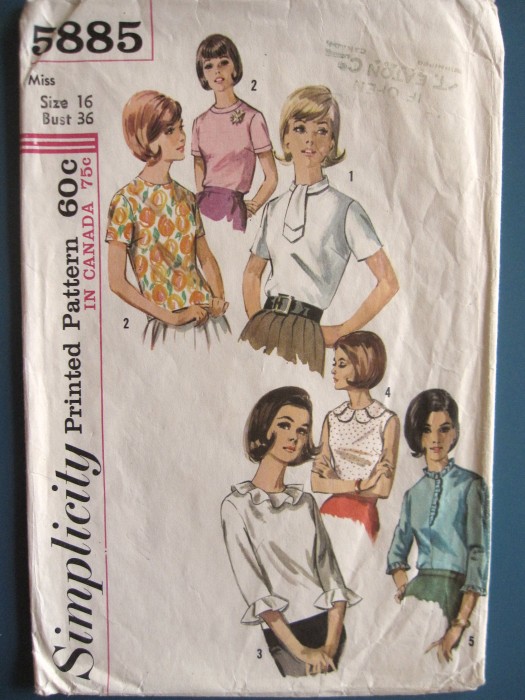
Simplicity 5885 (1965)
This was my first button backed top pattern. I like the idea, but honestly I’m not sure why this was so popular, as doing it up yourself is a little challenging – and that’s without wearing a girdle as most likely you would be in this era.
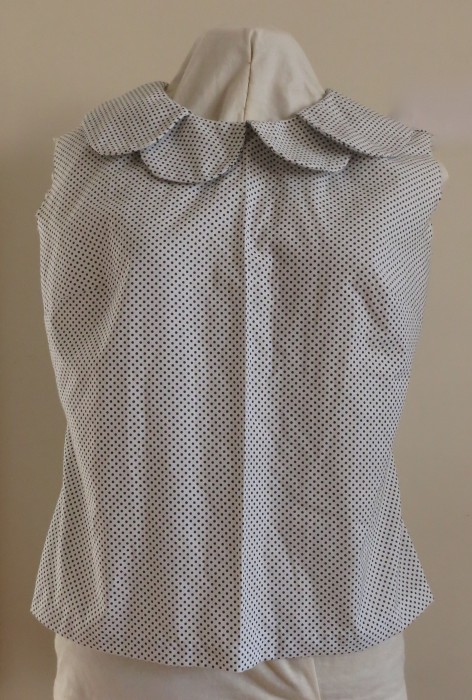
I chose the sleeveless version with the cute petal collar (#4). The fabric is a polkadot print cotton from a vintage stash I’ve mentioned here before. There was lots of it, and I am thinking of what else would be cute in the same material.
To start with, I traced the original pattern pieces onto tissue. The originals were uncut so I wanted to preserve them as best I could.
After cutting the main body pieces and collar, I did a quick neck fitting. As suspected, the front neckline was quite high. Did women have tiny necks back then, or just suffer? I wanted to keep the look fairly authentic, so I cut the front and back necklines down an inch all around. Then I redrafted the collar facings to match. The 6 collar pieces were spread out from their original placement to accommodate the change.
I also took in the side seams a little to give the blouse some shape. It’s actually a pretty boxy design – ok if paired with a nipped waist skirt, but I wanted to be able to wear it untucked as well. The nice thing about making up new garments from vintage patterns is that I don’t feel guilty when making alterations!
Since there were only 4 buttons on my version, I decided to do bound buttonholes. They are one of those things that, if you don’t do them all the time, you have to take a moment to wrap your head around again. I used Gertie’s step by step and, although a little time consuming, it worked out ok. I was lazy and decided to machine stitch in the ditch since this is really a trail run garment.
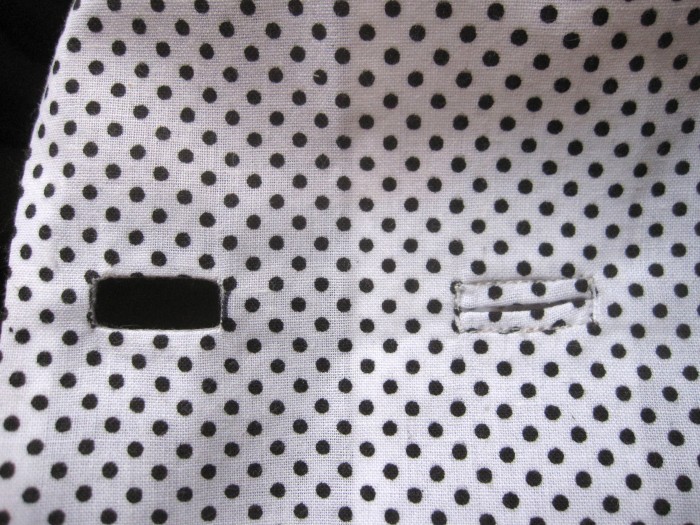
bound buttonhole and facing: right side
For the back facing of the buttonholes, I used a cheater trick and used a lightweight fusible interfacing to make the openings. The glue ends up facing the inside of the facing, and then is ironed onto it to hold the opening. The edges are whipstitched to the buttonhole anyways, so its a lovely way to keep things where you want them. This might not be a great solution for a garment that will be machine washed a lot, or for heavier fabrics, but it worked a treat in this situation.
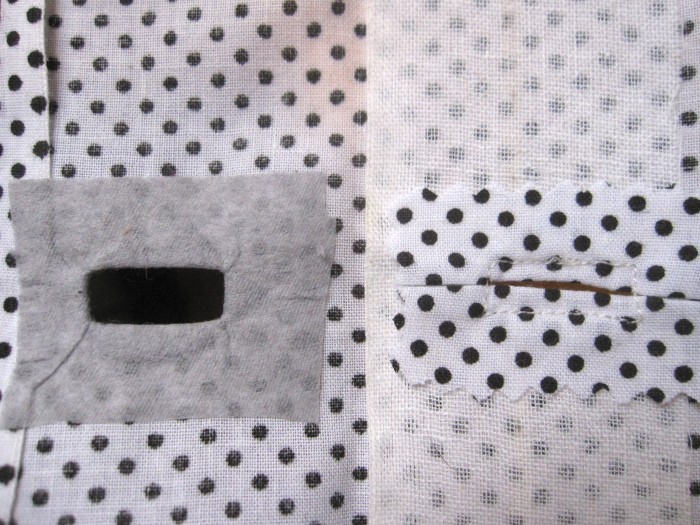
bound buttonhole and facing: wrong side
Although the hand stitching took longer than some more modern methods, my goal was to follow the vintage instructions as much as possible. With the buttonholes it was easy to follow my own whims as the instruction said something like “make buttonholes”. Its interesting to note that by the mid 1960s, pattern instructions seem to be fairly detailed. You are still expected to know certain skills, but far less is left up to the seamstress to decipher than some older patterns.
When made up, the petal collar seems far larger than the envelope illustration, but still looks pretty cute. A nice alternative to the traditional ‘peter pan’ version.
Along with making the neckline roomier, I was thinking that the arm openings might also be tight. Luckily, this was one area that could be left to be finished last. I held off cutting out the armhole facing so that I could make adjustments if necessary.
After whipstitching the facings and hem, I tried it on. Despite my side seam alterations, it was still looking very boxy. It looked ok with a high waisted skirt, but still had too much room in the top to flatter. Certainly nothing like the fitted look pictured on the pattern envelope.
The initial version – far too roomy. Simplicity 5885 by HLB.
At this point the blouse was relegated to the UFO bin. I wasn’t happy with the first version and couldn’t work out how to salvage it. Sometimes I find that logistical problems like this need time to gestate and then suddenly I get an ‘ah-ha’ brainwave of how to solve it.
In the end, I ended up having to remove the collar tabs and most of the neckline facing. I took about an inch out of the centre front by way of pin tucks, which also help give it a nicer line. I also extended the back shoulder darts down to the waist to help pull it in a bit more.
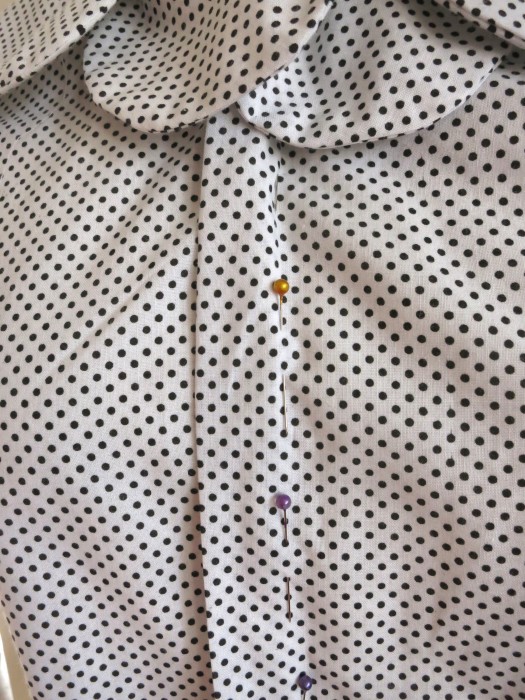
Centre front pinned to reduce excess fabric. Simplicity 5885 by HLB.
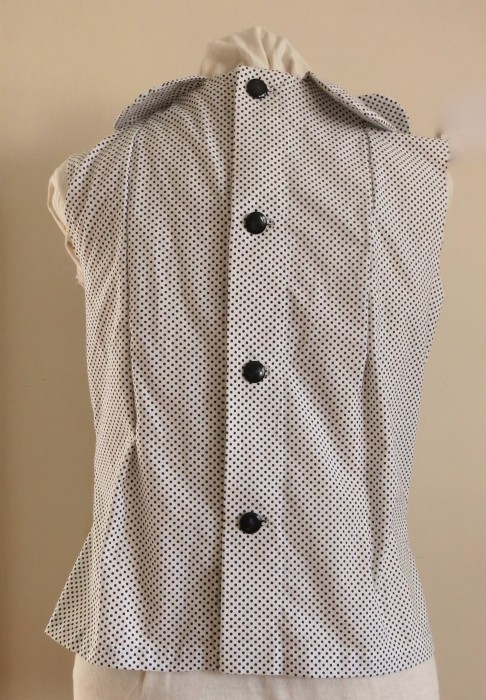
Back alterations in progress. Simplicity 5885 by HLB.
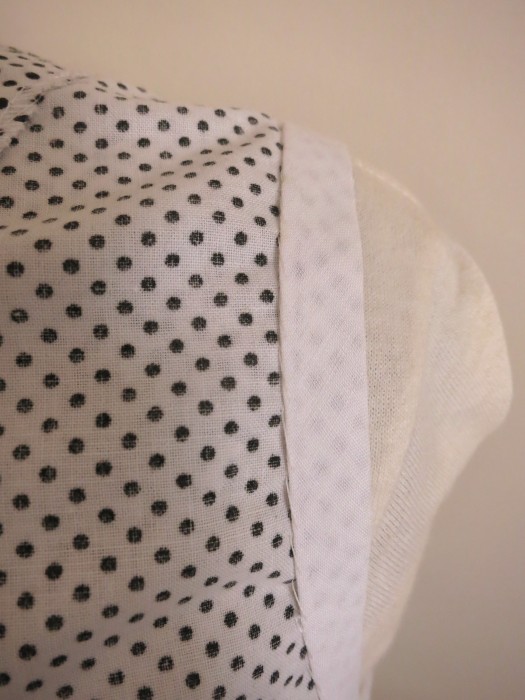
As an alternative to the armhole facings, I used some white bias tape. I wanted to avoid bulky layers, and the bias tape curves around pretty nicely.
Modified Simplicity 5885. Bias tape arm facings.
The final product is much improved over the straight up pattern, but required far too many extra fiddly tweaks.
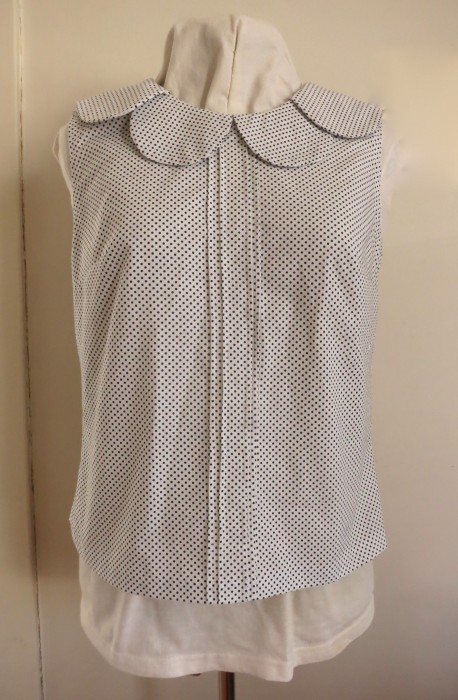
Modified Simplicity 5885. Pin tucks and polkadots.
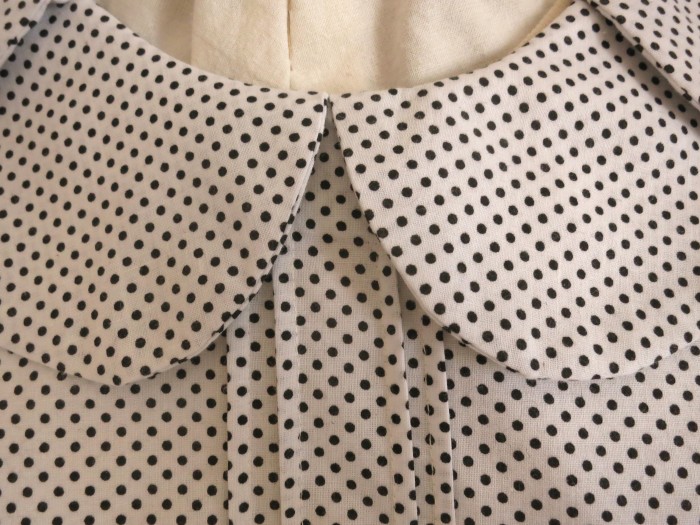
Modified Simplicity 5885. Pin tucks and collar detail.
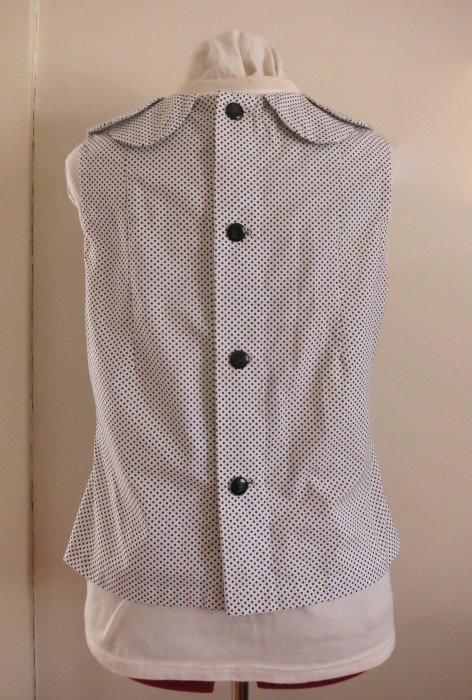
Modified Simplicity 5885. Back View.
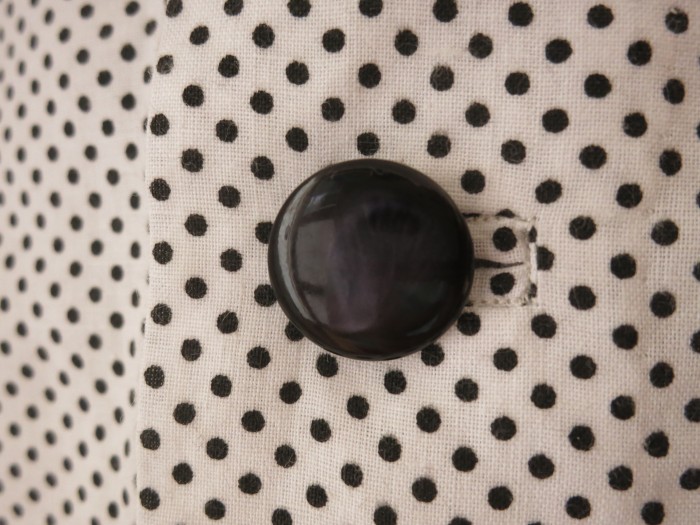
Modified Simplicity 5885. Button detail.
I’m not sure how much I’ll wear it, as it’s still not that flattering on me, but perhaps once I make more fitted skirts it could work. I’m also wondering if I graded it down at least a size, would it fit more like the envelope. It’s always a guesstimate with sizing. Unfortunately the pattern does not tell you how much ease is given vs. your actual measurements.
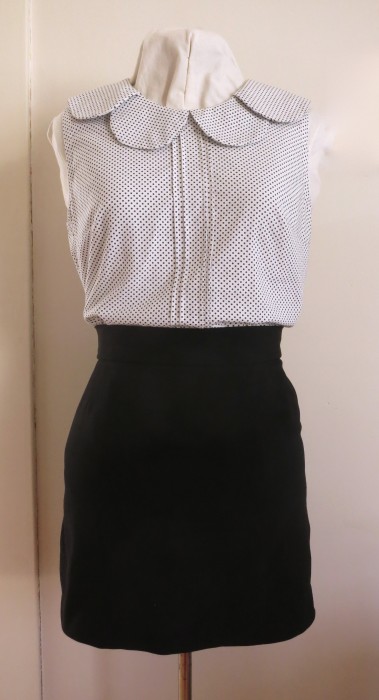
Modified Simplicity 5885 with a skirt (self drafted).
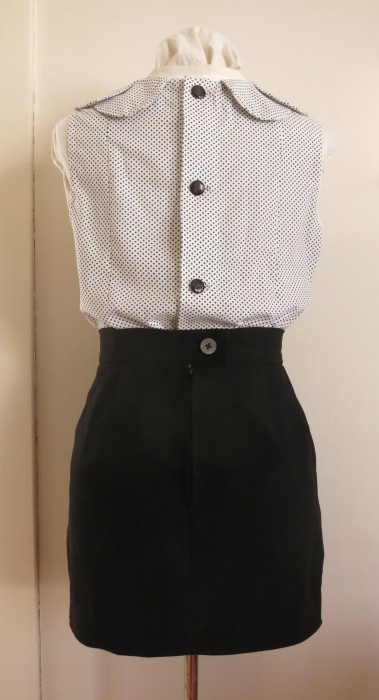
Modified Simplicity 5885. Back view worn with skirt.
I suppose that’s the vintage pattern lottery. Sometimes it turns out great, and sometimes it’s not quite what you pictured. Attempting to finish up some other UFOs in my bin, so Hopefully the next one will be more satisfying.
~ Heather


Pingback: 1965 Blouse: Simplicity 5885
Pingback: Gay Housden