
So we bought a house! What’s next?
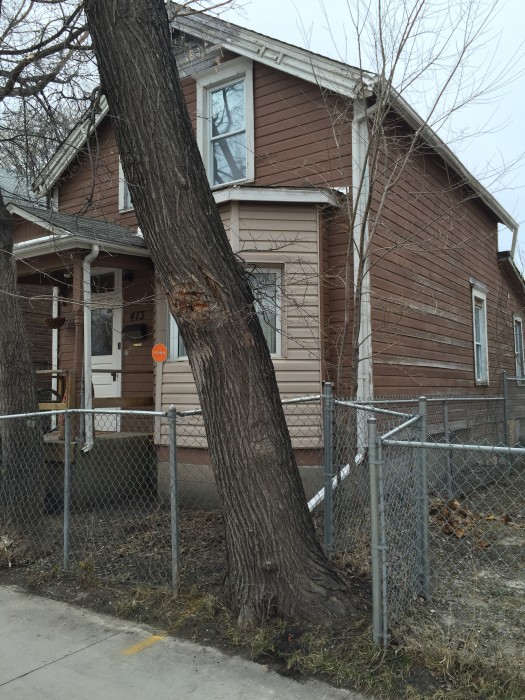
Another angle. The 2 trees in front of the house are lovely, but make it difficult to take good photos of the facade.
Most people like to get a place with minimal work to be done before moving in. We are not most people. In our case it was a month and a half of backbreaking labour to get it to a state we could move into. We wisely kept the apartment during this time so that we could work on the house without all of our stuff in the way. Unfortunately the time coincided with two previously planned trips out of town for Leif, making it more of a scramble and me with most of the packing to do in addition to fixing up the house. I did not anticipate just how stressful it would be, and many people have expressed disbelief at how much we did in such a short turnaround almost entirely on our own.
Gory details ahead, but first some #newoldhouse backstory.
After being owned and occupied by the same fellow for 50 years, it became a rental property in 2003. Unfortunately this means that whatever original character that was left in the house was ripped out or covered over by the patron saint of bad/sloppy house renovations : Slappy. Slappy did a great job of painting everything a hideous shade of mannequin beige, badly installing cheap fake wood flooring over the whole house to cover a multitude of sins, and ripping out the original clawfoot tub to replace it with a cheap surround version in beige. You may have noticed a theme developing here…
Pacific Avenue: Front Hall ~ Before
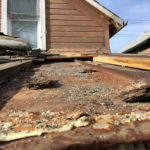
Slappy’s tenants had not taken any pride in maintaining anything either. The toilet leaked, walls and floors were filthy, and someone (we suspect kids) had shoved a large amount of garbage down the heating vents including diapers, plastic bags, toys and clothing. We discovered this last bit while cleaning out the ducts. It was so tightly packed that Leif had to ram a long 2×4 from the upstairs room down to clear the vent (so much gross).
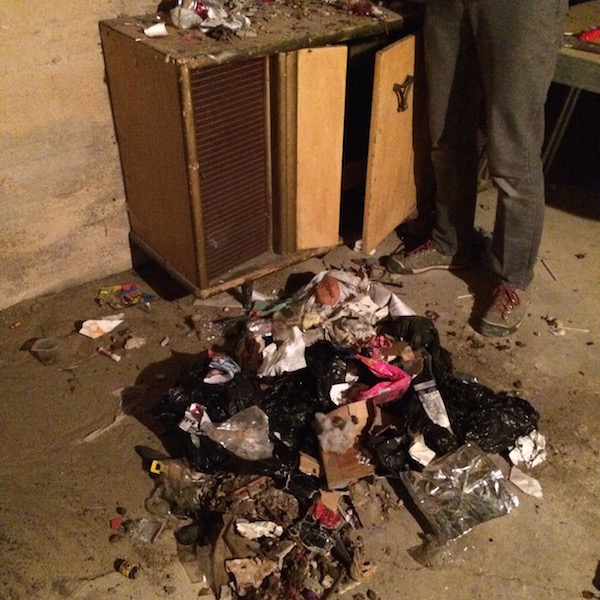
The pile of garbage that had been stuffed down a heating vent… #gross
We knew there was work to be done, but made a commitment to saving this house, and giving it some well deserved respect after those years of neglect. We both have an appreciation for old things and figured that if she’d survived nearly 120 years, we would treat her well. Since most of the original character had been ripped out, we knew we could make it our own with a mix of styles but would definitely be a) maintained properly and b) re-create and reference it’s Victorian heritage. That’s in a future post in which we make things pretty, but the grunt work of repairs and overhauling had to happen first.
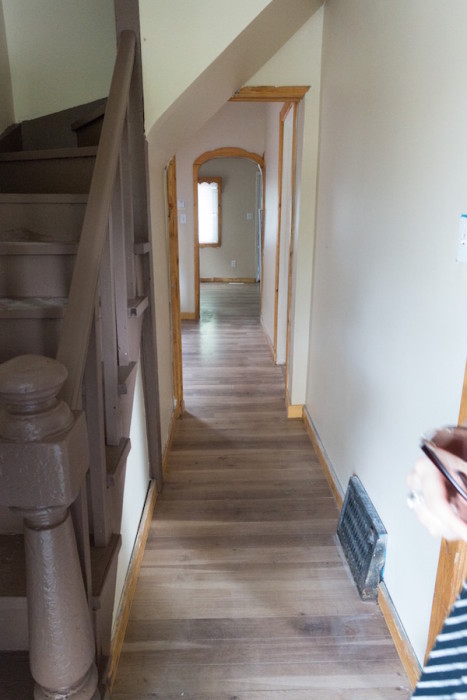
In the short time we had before moving in, priorities had to be made. On the list were some major undertakings and we both put many gallons of ‘sweat equity’ into them. We knew it was going to be a process, and many things would have to be undertaken after the move. It was going to get worse before it got better, and we’d have to live in renovation limbo for a while. My main concern was creating spaces free from pests, damp, and general grossness that our belongings could safely be stored, and we could retreat to and maintain sanity. When things are going to be ripped apart for the foreseeable future it’s important to have at least one space that is livable to avoid going completely mad.
The first order of business was to re-open the doorway between the living room and dining room present in nearly every Victorian home. An odd built in shelf plus a hollow sound confirmed our suspicions.
Pacific Avenue: Living room ~ Before featuring weird built in shelf.
Sure Enough, the original arched doorway was hiding under the drywall. It’s original sliding doors were long since gone. At some point, forced air heating was installed and the vents are where the doors would be pushed into the wall to open them.
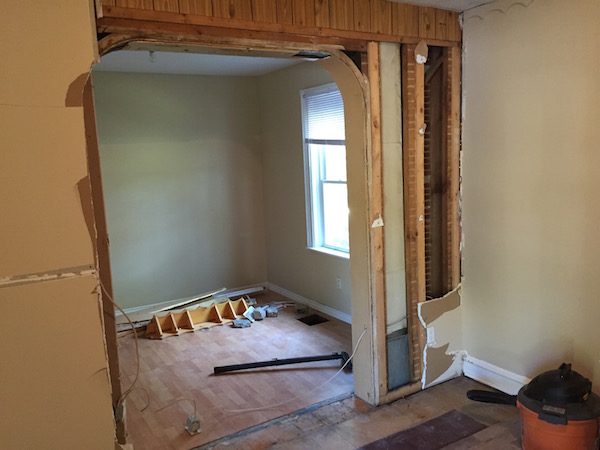
Living room in progress: original arched opening revealed (plus random layers under the drywall). The heating vent can be seen inside the wall, and a thin wood veneer was used to cover the gap in the door frame where sliding doors used to be.
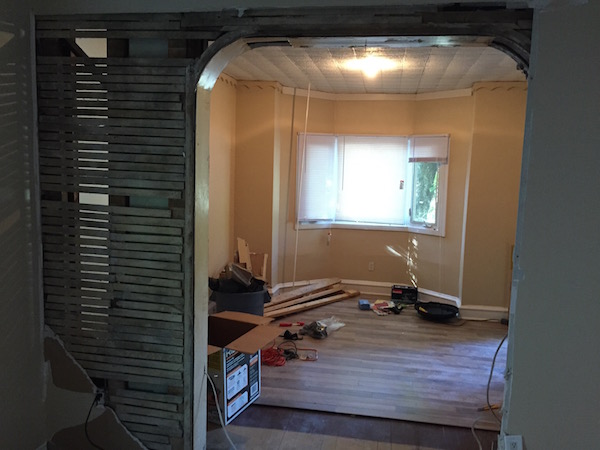
Living room in progress from the dining room. Flooring partially removed and faux stucco tiles on the ceiling.
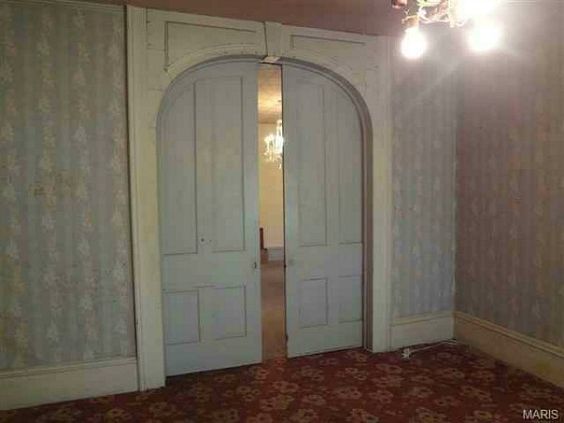
Not our house: One of the few examples I could find online of this style of door. Maybe ours looked something like this 1893 double pocket door.
The Ceiling in the living room was covered in what appeared to be stuccoed tiles. Upon investigation, they were made of white styrofoam and came down quite easily. Underneath was the original plaster, chunks of which were missing and the rest had peeling decor treatments. The original moulding had been replaced with reverse scalloped edging made from wood around most of the room.
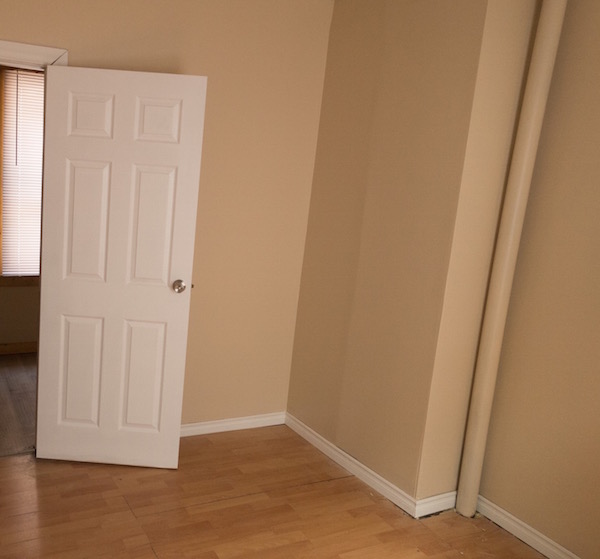
Over the front bay window we discovered a squirrel loft and promptly evicted (shop-vacced his nest and blocked holes into the house) the little guy (known affectionately as Chad). Chad was pretty pissed off and yelled at us from the front tree for many weeks. We knew that repairing the plaster would be too much of an undertaking at this time, and so hired my brother to install thinner drywall to seal it in and create a nice smooth ceiling. Unfortunately this was as far as we got with the living room before it was time to move in. The walls were still beige (although a little cleaner) and the honey coloured doorframe remained.
Pacific Avenue: Living Room ~ Before
We have confirmed that the original bay window was much larger. In fact, you can see the line in the drywall where the lower opening was filled in to kluge in this newer one! One day we plan to re-build it to it’s original dimensions in a style more suited to the house.
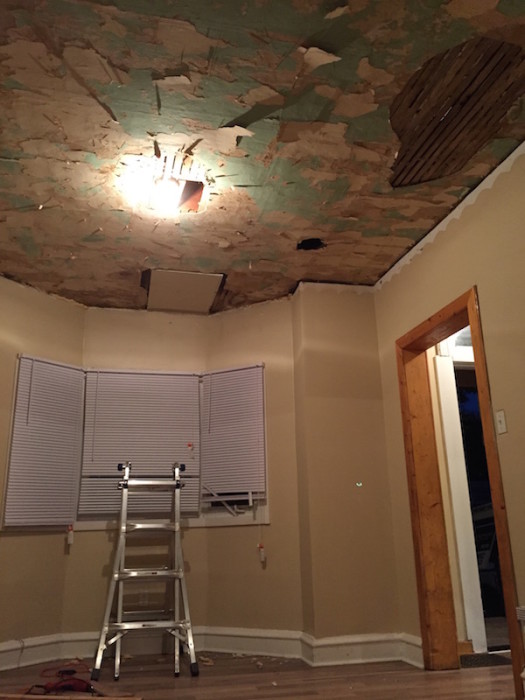
Living Room Ceiling: Original damaged plaster with a drywall plug for the squirrel nest, and hole to the right where a stove chimney would have gone through to heat the upstairs room.
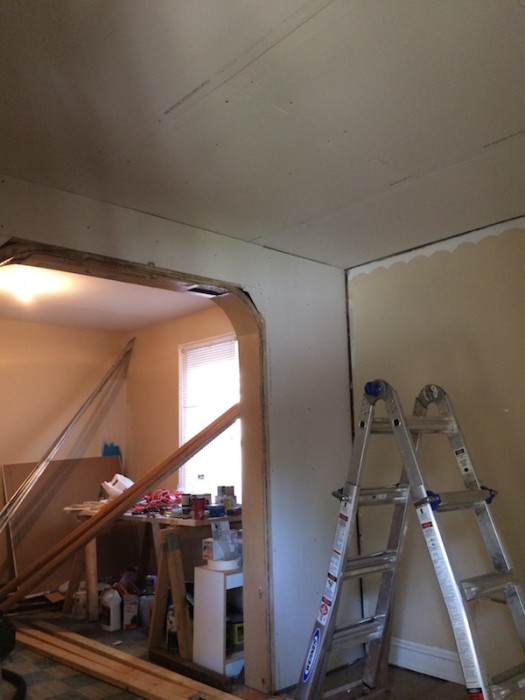
Living room in progress with new drywall on the ceiling and around the opening. Makeshift work table in the dining room.
Another running theme to the house was bare bulb light fixtures in every room. Luckily we had been storing an antique chandelier we’d found on a road trip. We had planned to use it in our apartment but it didn’t work out. It was the perfect thing for the NewOldHouse: period appropriate but understated. When we moved into the house and these rooms were still unfinished, at least we had a lovely light fixture!
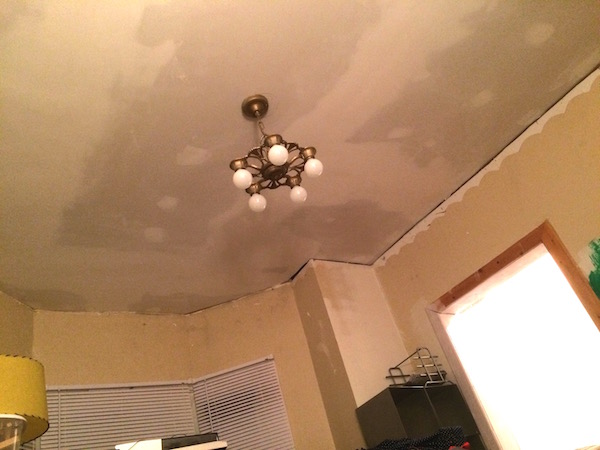
Living room ceiling newly drywalled. Antique chandelier installed.
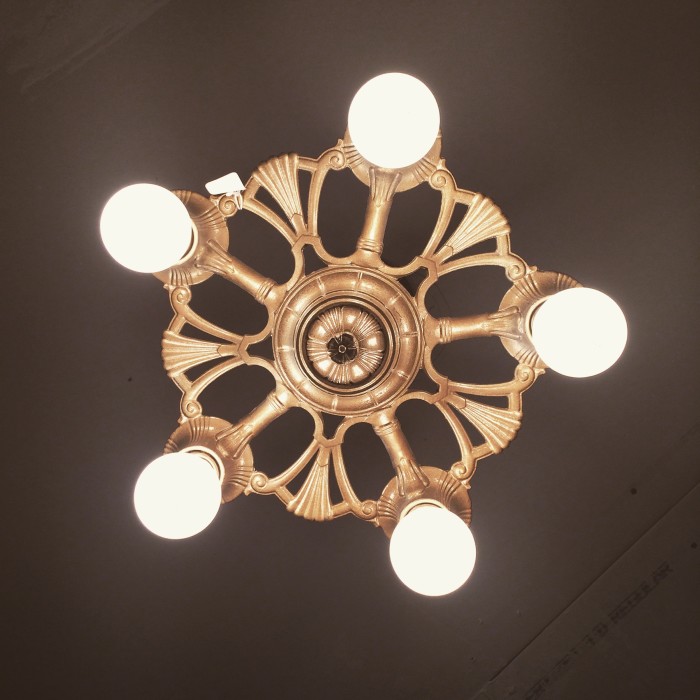
Lovely Art Nouveaux Chandelier finally in it’s new home.
The Dining Room is on the other side of the arched doorway. Aside from being walled off from the living room, a door had been installed in a wall not original to the house and had been used as a ‘4th bedroom’. The real estate listing even said the house was 4 bedrooms – typical rental property shenanigans…
Pacific Avenue: Dining Room ~ Before. Can you guess where the light switch is? Yes, it’s behind the door…
You can also see where the chimney has been walled off to create an odd narrow closet in the hall. Originally this room would have had a pot belly stove that was connected to the chimney. When we removed the drywall, we discovered many layers of wallpaper covering the brick chimney ranging from about the 1940s-1960s or 70s. At one point, this room was nautical themed!
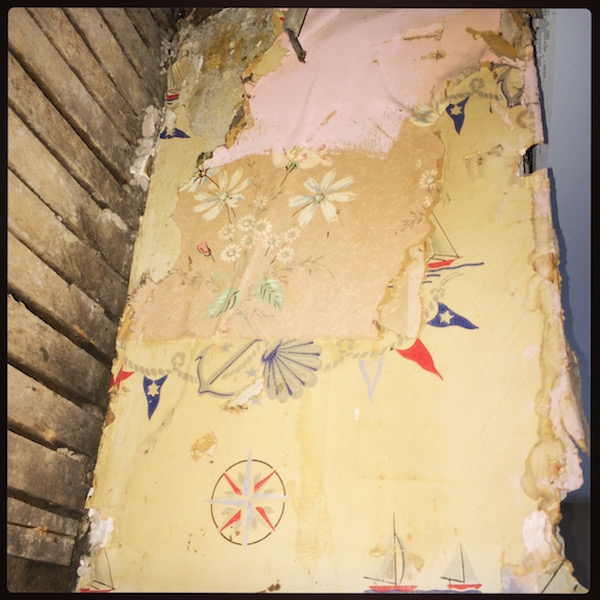
Chimney wallpaper layers.
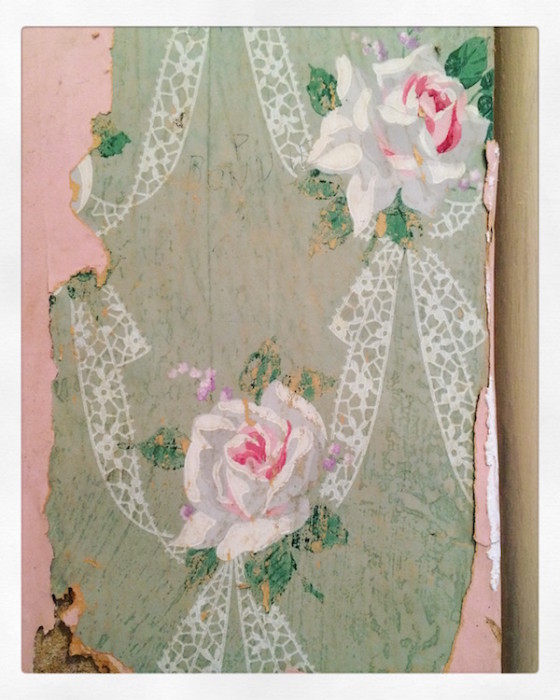
Love this massive roses and lace print wallpaper. Probably 1950s?
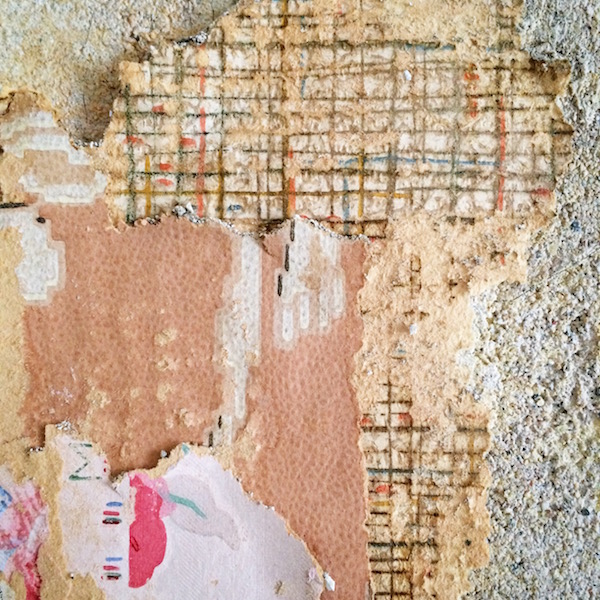
The first layer of wallpaper is very pulpy and has some gold tones in it.
Under the laminate flooring is c. 1950s tile glued to a c. 1930s painted wood floor. The tile does not come up easily and was in ok shape so we have left it for the time being (with a good scrub as usual). This room was primarily used as a workspace during the month before moving in. The door was removed (and used as a table as seen above). The window has the only original (or at least much older) frame on the whole main floor. New drywall was installed to re-seal the wall around the arched doorway, and the laminate removed, but walls remained unpainted and unfinished until after the move.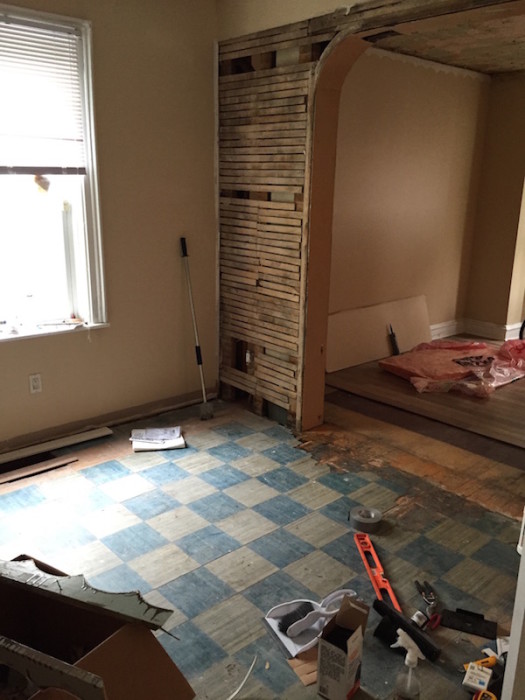
Next post: more NewOldHouse “fun” in the lead up to moving in…
Pingback: Operation New Old House: A Belated Introduction | Heather Lee Bea
Pingback: Operation New Old House: Slappy Was Here (Part 2) | Heather Lee Bea
Pingback: Operation NewOldHouse: It Gets Better! | Heather Lee Bea